
A garage floor coating is a construction process rather than a painting job. The color is chosen early and applied late. Most of the work in between goes into the concrete: establishing what condition it is in, correcting what needs correcting, and giving the coating a surface it can hold on to.
That is also why two quotes for the same garage can describe genuinely different amounts of work. Knowing what a thorough installation involves is the most practical way to tell those quotes apart.
This guide walks through what generally happens before, during, and after a professional installation. The exact sequence is not fixed. It changes with the system being installed, the condition of the slab, and the instructions published for the specific products in use.
The Initial Evaluation
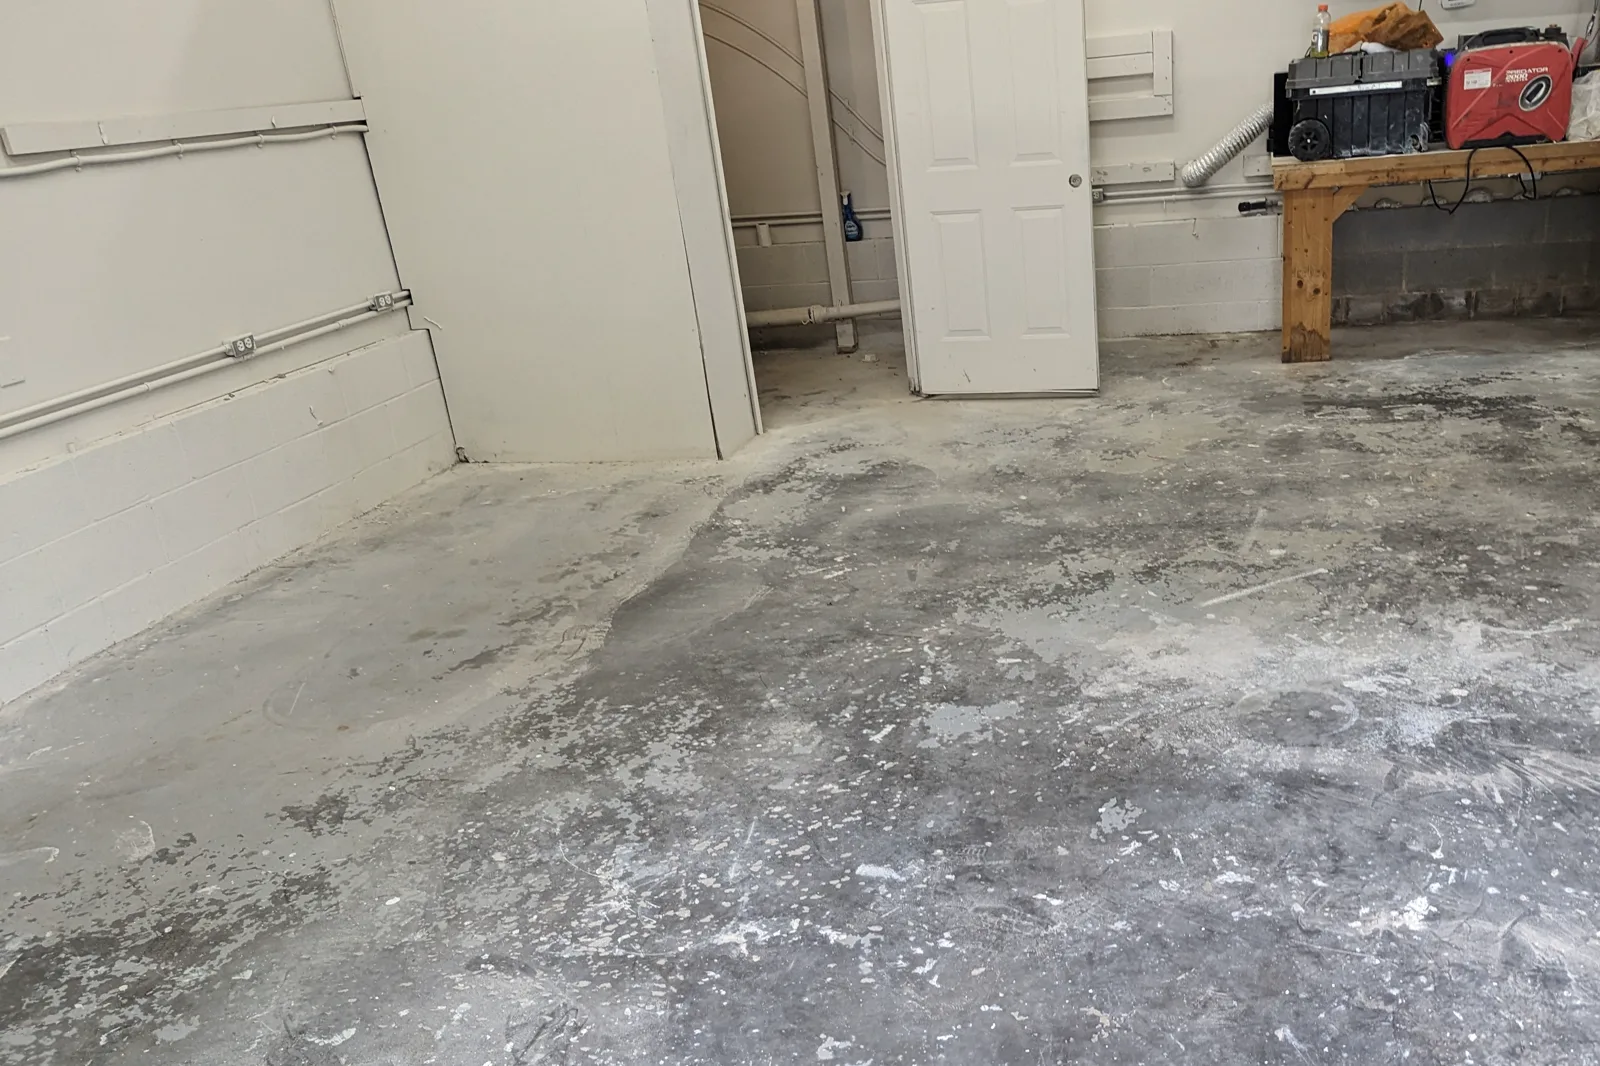
Before anything is quoted, the installer should spend time on the actual floor rather than on a phone call.
A thorough evaluation usually covers:
- Measuring the floor, along with any steps, stem walls, or thresholds to be included
- Looking for cracks, spalling, pop-outs, and areas that sound hollow or feel weak
- Looking for oil, grease, tire marks, and other contamination
- Identifying old paint, sealers, adhesives, or previous coatings
- Asking about moisture history, drainage, and whether the slab has ever been wet
- Discussing how the space is actually used, whether that is parking, a workshop, storage, or a gym
- Agreeing on appearance: color, flake or quartz blend, metallic effect, sheen, and texture
- Explaining access restrictions and roughly how long the garage will be unavailable
Some things cannot be known until the floor is opened up. Grinding regularly exposes cracks, soft concrete, or contamination that were invisible under dirt and old coating. A good proposal says in advance how those discoveries will be handled and priced, rather than leaving it to a conversation on the day.
Ask what happens if the crew finds something unexpected once grinding starts. How a company answers that question tells you a great deal about how it works.
What to Do Before the Crew Arrives
Unless moving and storage are part of the agreement, the garage needs to be completely empty.
- Remove vehicles, cabinets, shelving, tools, boxes, refrigerators, and anything else standing on the floor
- Clear access to the garage and the driveway, including space for equipment
- Confirm which wall-mounted or permanently fixed items can stay in place
- Point out anything that cannot be unplugged or moved, such as freezers, water heaters, and electrical panels
- Arrange parking elsewhere for the whole cure period, not only for installation day
- Mention known leaks, flooding, previous coatings, oil spills, and past slab repairs
- Keep children and pets away from the work area
- Check whether a homeowners association or property manager needs notice
Items stored against a shared wall are worth protecting as well. Even with good dust collection, grinding concrete is construction work and it is not silent or entirely dust-free.
Job-Site Setup
The crew confirms the scope, photographs the existing condition, and protects what is staying: door frames, walls, thresholds, and anything that cannot be moved. Power and dust extraction are set up before any equipment runs.
Conditions on site may also be recorded, including air temperature, slab temperature, humidity, and dew point. Coating products are published with acceptable ranges for these, and a slab close to the dew point can develop condensation even when the room feels dry. If conditions fall outside what the product allows, the responsible decision is to wait rather than to proceed and hope.
Removing What Is Already There
Where the slab already carries paint, sealer, adhesive, carpet strip residue, or a previous coating, that material has to come off before anything new goes down.
How much work this is depends entirely on what is present and how well it is stuck. A thin, well-bonded sealer behaves very differently from a failing coating that releases in sheets. A garage that has been coated before is a different scope from bare concrete, and it is worth flagging early, because it is one of the more common reasons a quote changes after the walkthrough. If a previous floor came loose, it is also worth understanding why coatings fail before the same slab is coated again.
Mechanical Surface Preparation
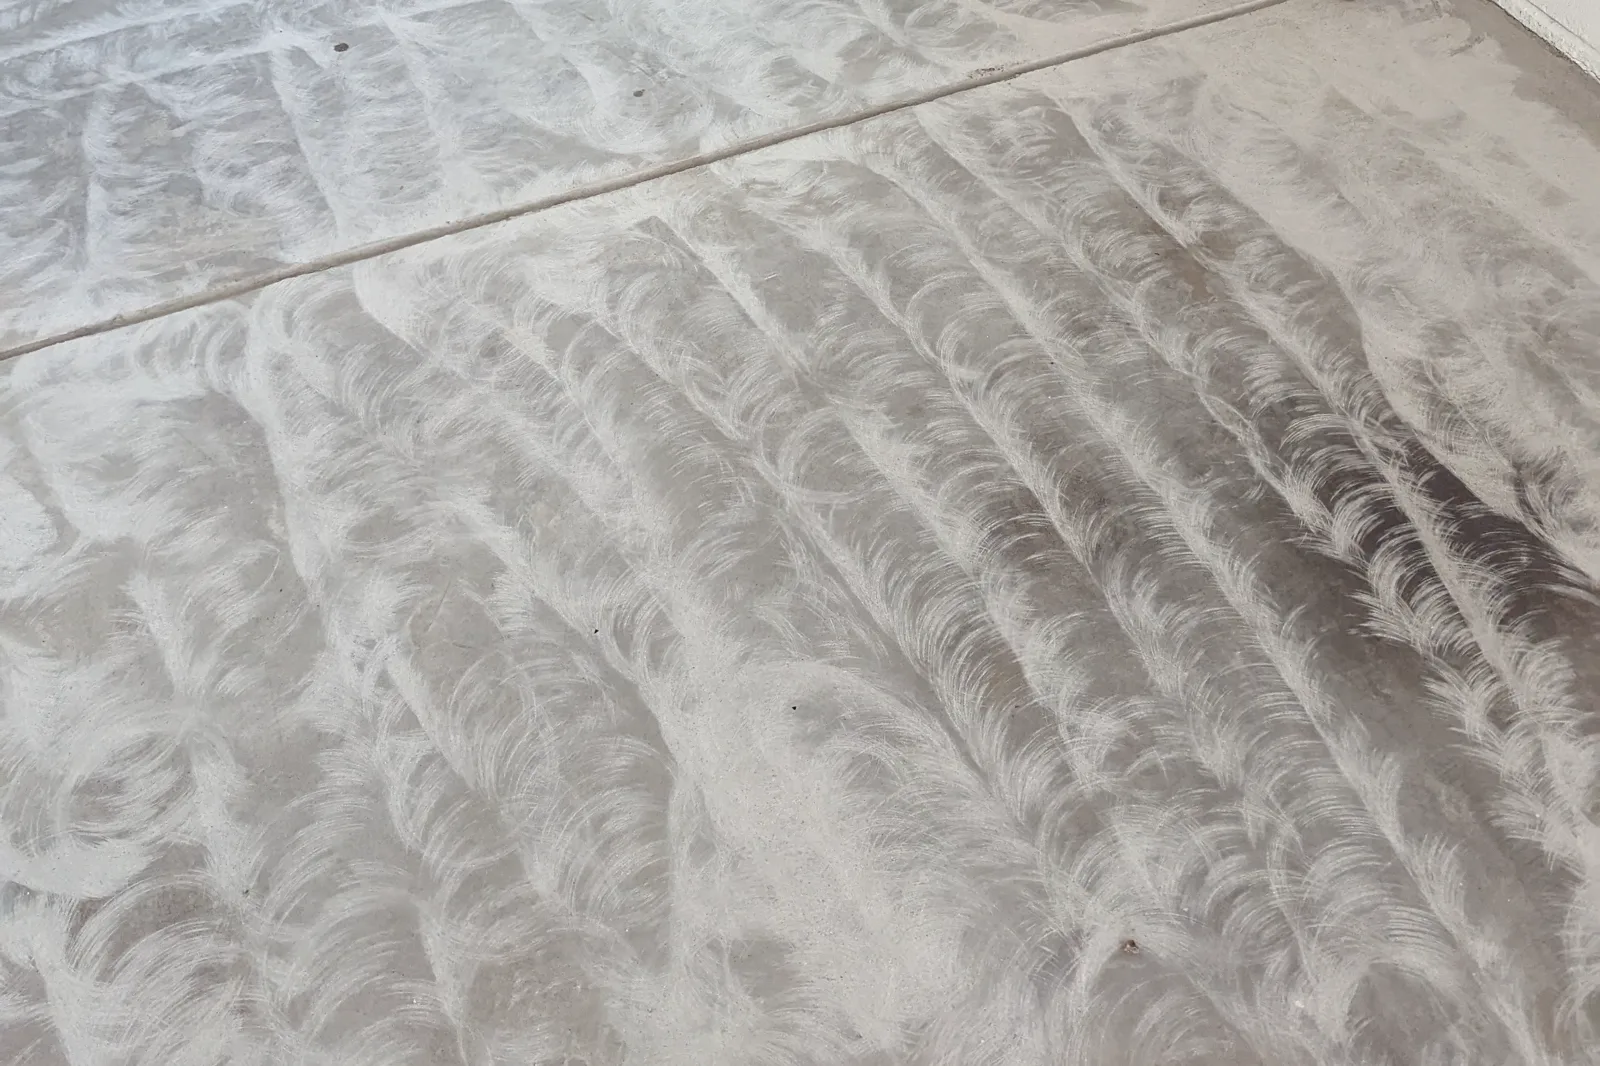
This is the step that determines whether everything above it has a dependable surface to bond to.
The top of a slab is weaker than the concrete below it, and it may also carry curing compounds, sealers, or old coatings. Diamond grinding or shot blasting removes that material, exposes sound concrete, and leaves an open texture for the coating to key into. Washing, acid etching, and light sanding are not equivalent, because they can clean a surface without removing the weak layer underneath it. Mechanical surface preparation is covered in more detail on its own page, including edges, repairs, and what a proposal should specify.
How much texture is appropriate is a specification question rather than a preference. A thin coating needs less profile than a thick, high-build one, and the coating manufacturer states what its system requires.
The uncomfortable part for a homeowner is that this step is invisible afterwards. A floor prepared properly and a floor that was merely washed can look identical on handover day and behave very differently two years later. That is the main argument for getting the preparation method stated in writing, and it is covered in more detail in the guide to why floor coatings come loose.
Edges, Corners, and Detail Work
Walk-behind grinders cannot reach the last few inches of a floor. Perimeters, corners, door thresholds, steps, stem walls, and the areas around posts, drains, and fixed equipment have to be prepared separately with hand-held grinders, usually with their own dust extraction.
This is slow, awkward work, and it is one of the first things to suffer when a job is rushed. It matters more than its size suggests, because edges and thresholds are exactly where a floor gets water, mop contact, door movement, and the most concentrated foot traffic. A perimeter strip that was never properly prepared tends to be where a coating starts to lift.
If you are comparing proposals, it is reasonable to ask specifically whether edge and detail preparation is included, and how far up any stem wall or step the coating is intended to run.
Cracks, Joints, and Surface Defects
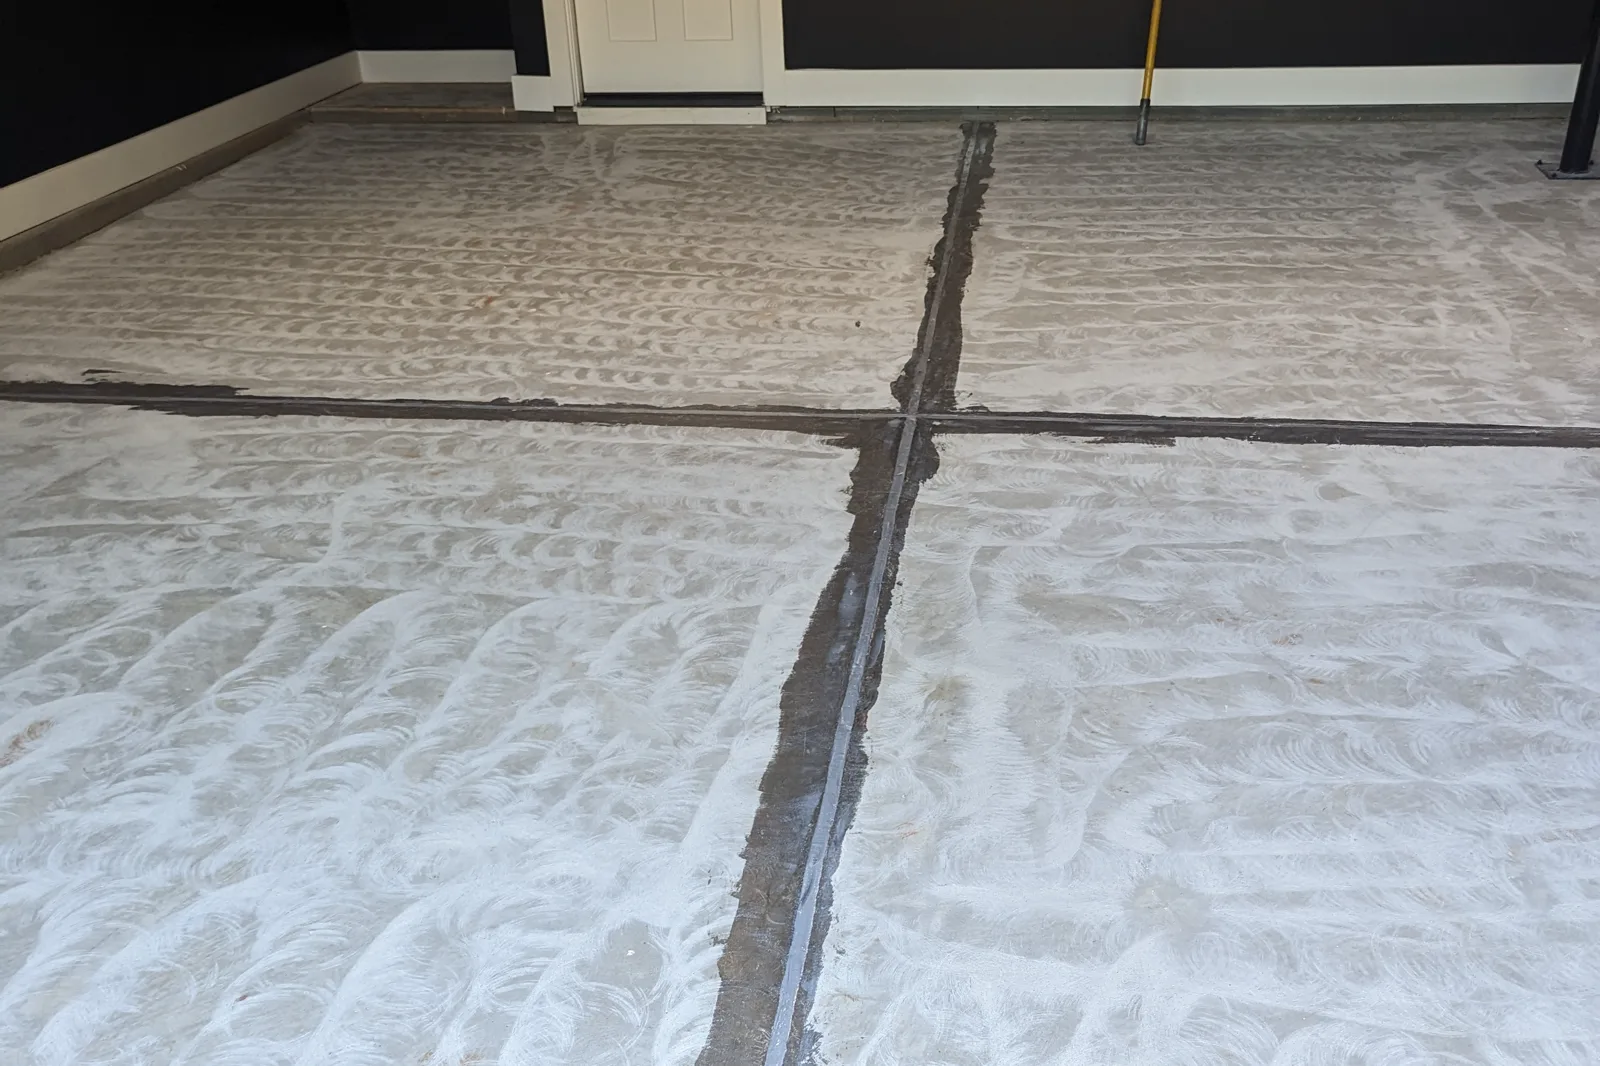
Not every line in a slab is the same thing, and they are not all treated the same way.
A static crack that is no longer moving may be opened out, cleaned, and filled with a repair material compatible with the coating that will go over it.
A control joint is the saw cut deliberately placed to tell a slab where to crack. Many control joints continue to move slightly with temperature and moisture. Filling one rigidly and coating straight across can result in the coating splitting along the same line later. Some systems carry the joint through to the finished surface instead of hiding it; others use a flexible filler. Which is appropriate depends on the joint, the slab, and the system being installed.
A moving or structural crack is a different problem again, and may need to be understood before coating the floor makes sense at all.
Spalls, pop-outs, and low spots are generally rebuilt with a compatible material, then ground flush and vacuumed once cured.
A coating cannot stop a slab from moving. Where movement exists, a good installer explains what may still telegraph through the finished floor rather than promising it will disappear.
Ask which lines in your floor are cracks and which are control joints, what will be done with each, and whether any are expected to stay visible in the finished floor.
Cleaning and Dust Removal
After grinding and repairs, the floor is vacuumed thoroughly, often more than once, including into joints, corners, and along edges. Dust left behind sits between the concrete and the primer and does the coating no favors.
This is also the point at which the slab can be inspected properly for the first time. With the surface open and clean, cracks, soft patches, and contamination that were hidden before are finally visible, and the plan may need to change accordingly.
Primer and Base Coat
Depending on the system and the condition of the slab, a primer may be applied to penetrate the concrete, seal porosity, and reduce pinholing in the coats above.
Where moisture testing indicates it is needed, a product specifically intended for moisture mitigation may be specified instead. A standard primer is not automatically a moisture barrier, and treating one as though it were is a meaningful risk.
Most professional flooring products are supplied in two parts that must be combined at the correct ratio, mixed for a specified time, and used within a working window that starts as soon as they are combined. Once mixed, the crew is working against that window, which is why an experienced team moves in a coordinated way and why a system with a short working time is not a good place to learn.
Flake, Quartz, and Metallic Are Different Builds
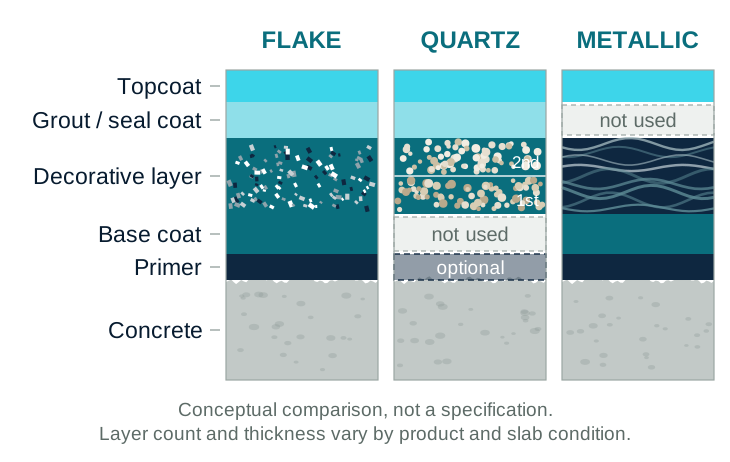
The word epoxy gets used as though it described one product. In practice, the decorative layer is where garage floor systems diverge most, and the differences change the number of steps, the time on site, and the price.
Flake systems broadcast vinyl chips into a wet base coat. A partial broadcast leaves some base color showing; a full broadcast continues until the wet coating is completely covered. Once cured, the loose excess is removed and the surface is scraped or sanded to control texture before sealing. The flake flooring guide covers how blend, broadcast density, and the finish coat change the result.
Quartz systems broadcast colored quartz aggregate rather than vinyl chips, commonly in more than one pass. The result is heavier, more textured, and generally thicker than a flake floor.
Metallic systems disperse pearlescent pigment through a semi-transparent coat over a pigmented base. The pattern develops as the material cures, which means no two floors match exactly and a sample approved in advance matters more than a color name.
Published manufacturer literature shows how much these builds differ. Sherwin-Williams documents its Resuflor Deco Flake SB system as a primer, base coat, broadcast, and grout or seal coat at a nominal 1/16 inch; its Resuflor Deco Quartz DB23 system as an optional primer, two broadcast passes, a grout coat, and a topcoat at a nominal 1/8 inch; and its Resuflor Topcoat Metallic II system as a pigmented primer and base coat, a metallic coat, and a urethane topcoat. Those are that manufacturer's own published sequences for those named systems. They are useful as examples of how such builds are structured, and they should not be read as a description of every flake, quartz, or metallic floor on the market.
The Broadcast
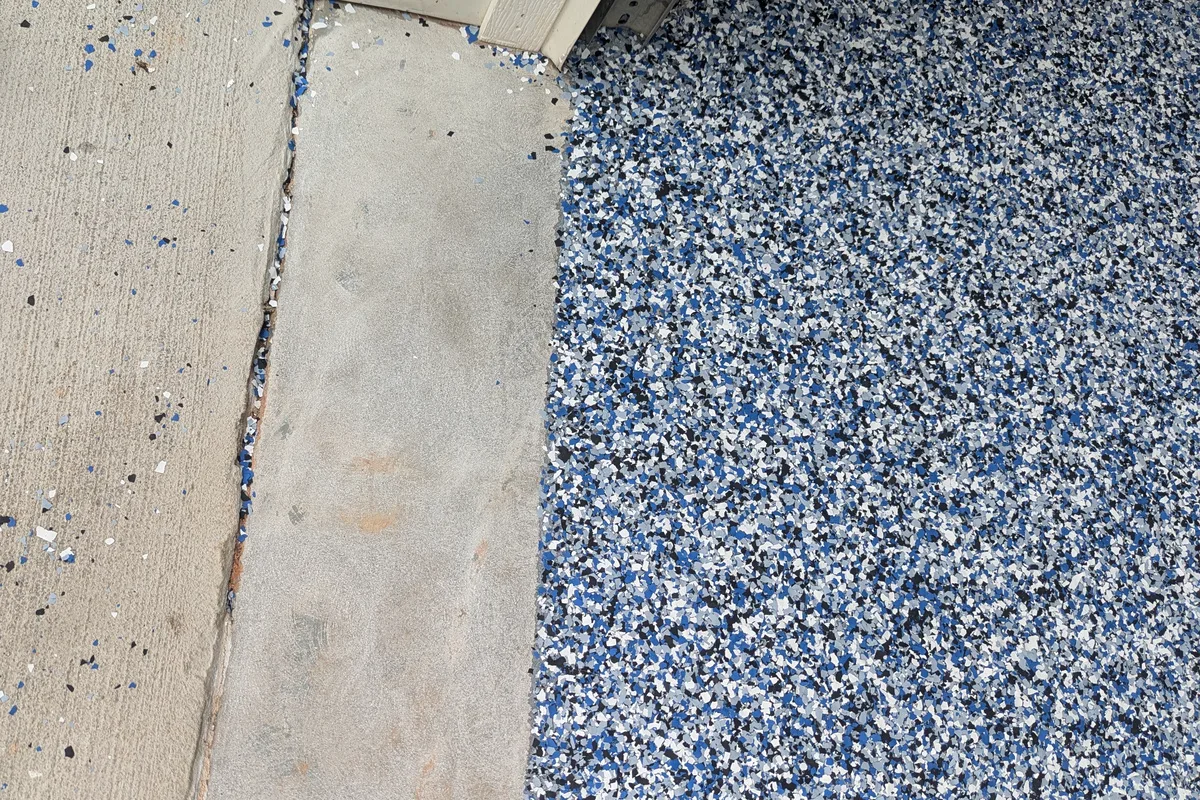
Broadcasting is the messiest and most time-sensitive part of a decorative installation. The media has to go into the coating while it is still wet, spread evenly, and reach the coverage the design calls for, which for a full broadcast means continuing until no wet coating shows through.
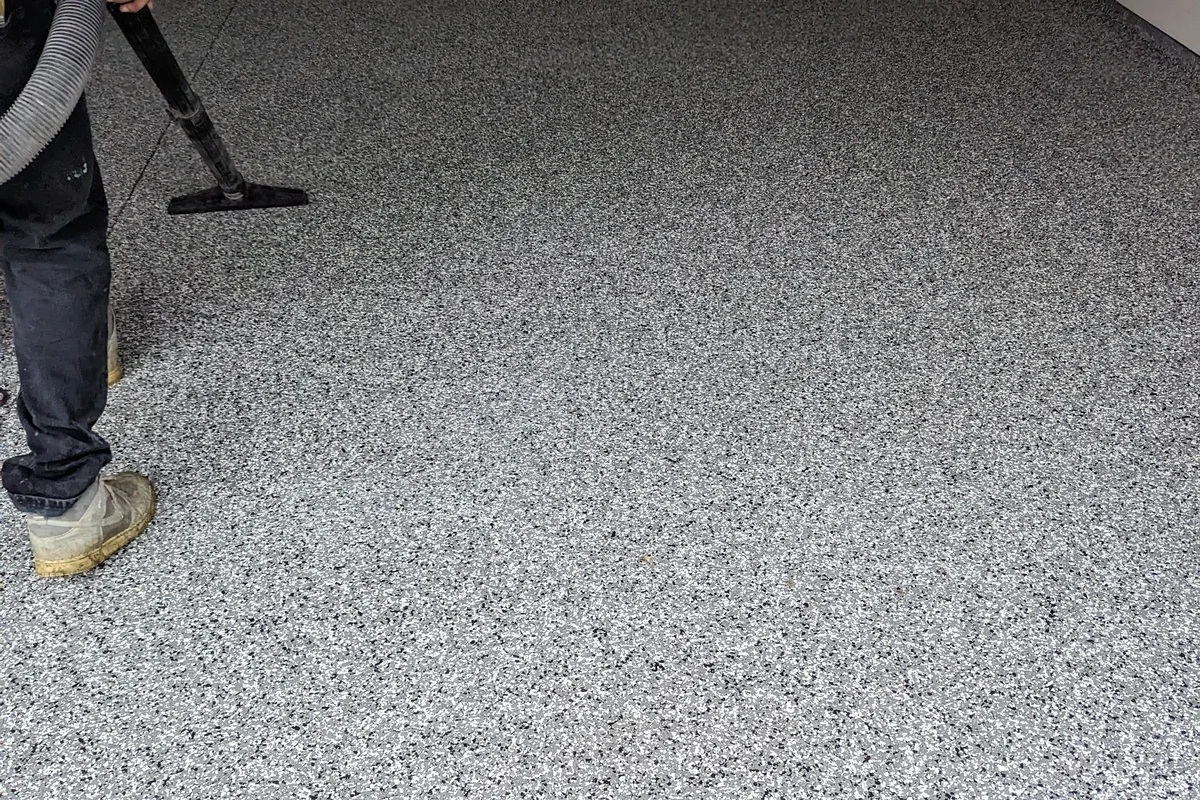
Once the coating has cured enough, everything that did not bond has to come off. The surface is scraped or sanded back to the texture the finish requires, then vacuumed. Media left loose under a topcoat becomes a defect in the finished floor.
Grout Coat and Topcoat
A grout or seal coat fills the spaces between broadcast media and creates an even surface for the finish. Not every system uses one, and heavily textured broadcast floors may need more than one.
The topcoat is the layer you actually walk on and clean. It provides the sheen, the wear surface, the slip resistance, and whatever ultraviolet stability the system offers. Slip-resistant additives can be included, and the amount is worth discussing rather than leaving to chance: an aggressive texture is harder to mop, while a smooth gloss can be slick when wet.
Topcoat chemistry is a decision in its own right, and it interacts with cure time and sunlight exposure. The comparison of epoxy and polyaspartic systems covers the trade-offs.
Crew Time Is Not Floor Time
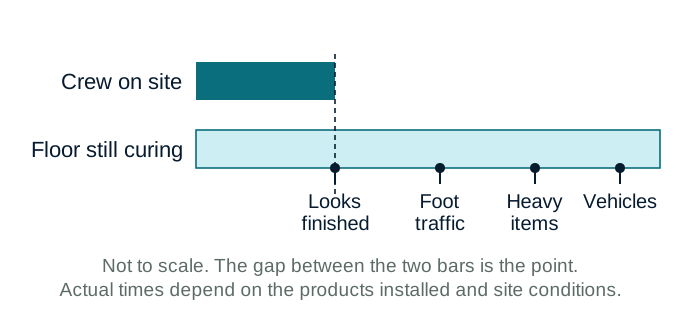
This is the single most common misunderstanding about garage floor installation. A one-day installation describes how long the crew is on site. It does not describe when the garage is usable again.
The floor will look complete when the crew packs up. Underneath, the system is still developing the strength it needs to take foot traffic, then heavier loads, then vehicles, and finally exposure to fuels and cleaning chemicals. Those milestones arrive at different times, and using the floor at the wrong one can mark the surface or damage layers that are still curing.
There is no universal schedule for this. Return-to-service times depend on the specific products installed, how many layers there are, and the conditions on site, so the only schedule worth following is the one supplied for your floor. Ask for it in writing, with separate times for foot traffic, returning stored items, parking, washing, and chemical exposure.
Noise, Dust, Odor, and Access
Grinders, shot blasters, and industrial vacuums are loud. Professional dust extraction reduces airborne dust considerably but does not eliminate it, so it is sensible to close interior doors and move anything dust-sensitive out of adjacent spaces.
Odor varies by product. Low-odor is not the same as odorless, and low-VOC does not remove the need for ventilation. The installer should say what to expect, how long it lasts, and what the access and ventilation arrangements are for people and pets in the house.
What the Finished Floor Should Look Like
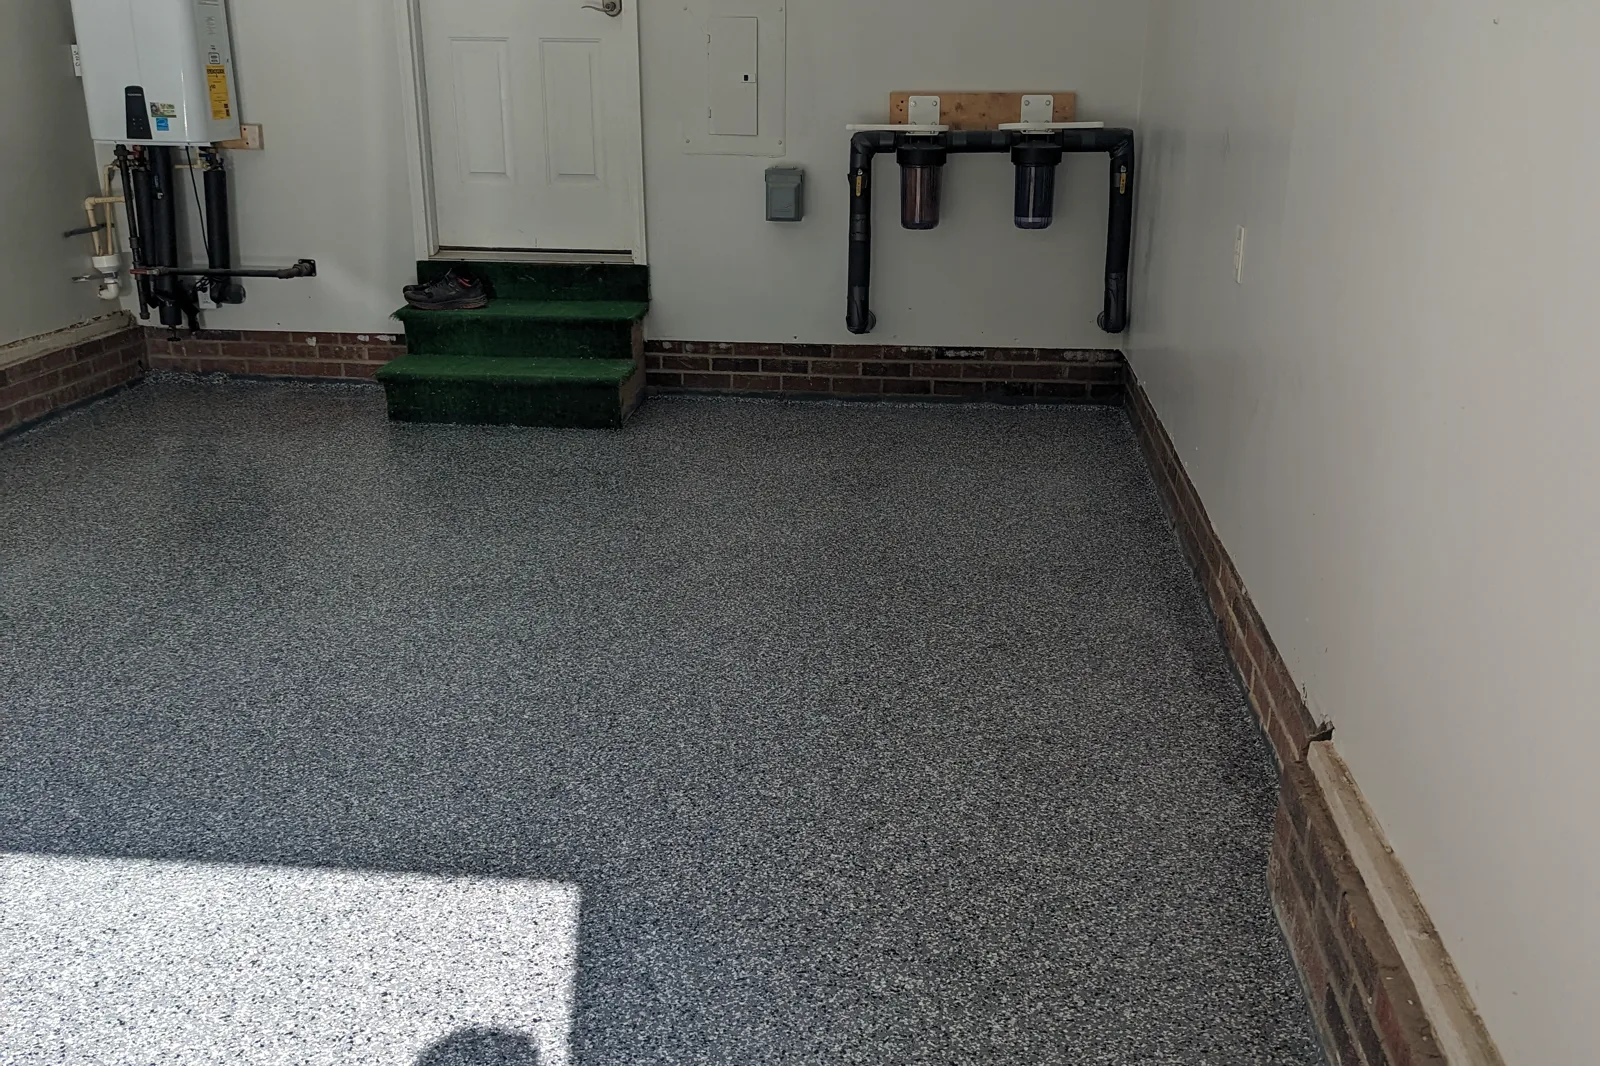
A professional floor should read as consistent overall, but concrete is not a factory product and these systems are applied by hand. Some variation is normal rather than defective:
- Flake or quartz distribution that is not perfectly uniform
- Movement and variation in a metallic finish, which is the point of the finish
- Visible texture where slip-resistant aggregate has been used
- Slight differences at edges, thresholds, and vertical surfaces
- Repaired cracks that remain faintly visible
The way to avoid disappointment is to agree in advance on samples, sheen, texture, and coverage, and to be explicit about anything in the slab that is expected to remain visible.
The Final Walkthrough
Walk the floor with the installer before the crew leaves, ideally in good light and from more than one angle. Look at the edges and thresholds, not just the middle. Ask about anything that looks unintended while everyone is still on site, because it is far easier to resolve then than a month later.
What You Should Receive
Ask for the following in writing at handover. If a contractor cannot produce it, that is worth knowing before you sign rather than after:
- The system installed, including the base coat and the decorative media
- The topcoat used, with its sheen and any slip-resistant additive
- Return-to-service times for foot traffic, heavy items, vehicles, washing, and chemical exposure
- Cleaning and maintenance instructions, including which products to avoid
- A record of repairs carried out, and how cracks and control joints were treated
- Any warranty offered, with what it covers and what it excludes
- Product data sheets for the materials installed, where the contractor can supply them
Photographs taken during preparation are worth requesting too. Once the topcoat is down, nobody can see what happened underneath, and those images are the only record of it.
The Bottom Line
The visible part of a garage floor installation is the smallest part. Evaluation, removal, grinding, edge work, repairs, and cleaning decide how the floor performs, and all of them are finished before the color goes on.
That is also what makes quotes hard to compare on price alone. Two proposals can describe very different amounts of preparation and very different builds, which is why what a coating costs depends so heavily on the slab and the system rather than on square footage.
If you are weighing up what to have installed rather than how it is done, the guide to residential garage flooring approaches the same project from the buyer's side.